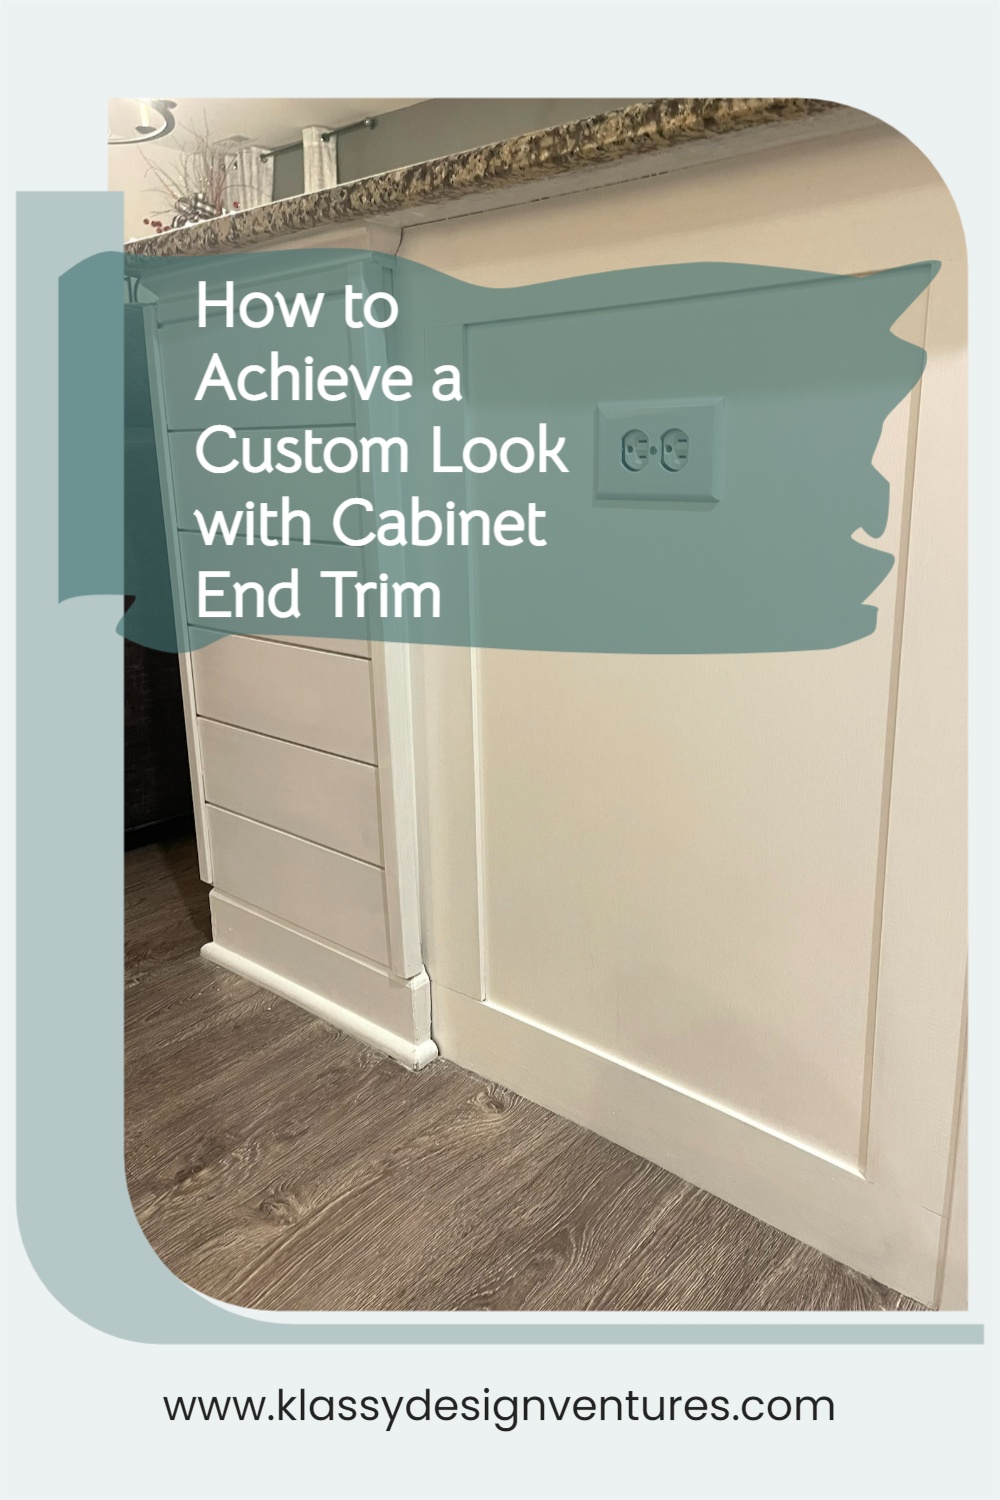
How to Make Your Cabinets Look Custom


Gift Ideas That Your Teen Will Love!
Please share with your friends! Share Pin Email Welcome, gift givers and teen enthusiasts! If you’re on a quest to find the perfect gift for the teenage girl in your life, look no further. I understand that the world of teenage trends is ever-evolving, and choosing the right gift can be daunting. Fear not! This comprehensive gift guide is here to help you navigate the realm of teenage desires, offering a delightful mix of trendy and timeless options. I’ve got you covered whether she’s into fashion, technology, self-care, or creative pursuits. Fashion Finds: Personalized Jewelry: Choose a stylish necklace or bracelet with her initials or birthstone for a thoughtful touch. Trendy Apparel: Stay on top of the latest fashion trends – oversized sweaters, graphic tees, and joggers are all the rage. Tech Treasures: Wireless Earbuds: Opt for a sleek pair of wireless earbuds for a seamless music and podcast experience. Smartphone Accessories: A stylish phone case, pop socket, or portable charger can be both practical and fashionable. Creative Corner: Art Supplies: Nurture her artistic side with high-quality sketchbooks, paints, or markers. DIY Kits: Explore DIY kits for jewelry making, candle crafting, or even personalized room decor. Literary Love: Best-Selling Books: Research popular young adult novels or the latest releases from her favorite authors. Bookish Merchandise: Consider book-themed items like literary-inspired clothing, mugs, or posters. Self-Care Splurges: Skincare Sets: Pamper her with a skincare bundle featuring masks, serums, and moisturizers. Aromatherapy Diffuser: Create a tranquil atmosphere with a stylish diffuser and a selection of soothing essential oils. Fitness and Fun: Athletic Wear: Upgrade her workout wardrobe with stylish and comfortable athletic wear. Fitness Tracker: Keep her motivated with a fitness tracker that also doubles as a trendy accessory. Music Mania: Vinyl Records: If she appreciates a retro vibe, vinyl records of her favorite artists make for a unique gift. Concert Tickets: Surprise her with tickets to see her favorite band or artist in concert. Finding the perfect gift for a teenage girl can be an exciting adventure. Whether you choose to explore the latest trends or opt for timeless classics, the key is to consider her interests and passions. With this diverse gift guide, you’re well-equipped to make her day extra special. Happy gifting! Here are a few gift ideas for that teen lady on your list this year! Macbook Protection Bundle Kendra Scott Necklace The Gym People-Bra Top White Nike Crew Socks All White On Cloud Sneakers Silk Pajama Set Sol De Janeiro Body Fragrance Mist More from my siteWelcome Friends!Simple Patio DIY Privacy Solution6 Amazing Porch Decorations to Inspire You This SeasonClean Up Your Bathroom Cool Toothpaste Hack!Simple Solutions for Closet Organization??- Zero $ Closet Makeover6 Command Products to Complete Your Next Project
Hot Cocoa and Gingerbread-Themed Coffee Bar
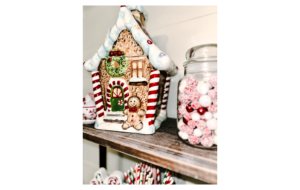
c My coffee bar is one of my favorite places in my home! Today, I will be sharing how I decorate it specifically for Christmas! This area is always my seasonal go-to when I’m having a little fun with decorating. Check out how I decorate for Halloween, too! Halloween Coffee Bar Starting at the top of my 3-tier wooden Shelf, which I picked up on Amazon. I started with the sweetest gingerbread house, a cookie jar from Hobby Lobby. The jar to the right is an upcycled jar I found around the house, and the foam decorations came from Micheals. Dollar General has lots of small decor pieces you can use as fillers. Create a dedicated hot cocoa/coffee station with all the essentials. Set out a variety of hot cocoa mixes, marshmallows, whipped cream, and festive toppings like crushed candy canes or chocolate shavings. Consider using mason jars or decorative containers for a charming display. I’ve picked up an assortment of Christmas-themed mugs for my guests. Whether it’s classic red and green designs or ones adorned with cute reindeer and snowflakes, the right mugs can add an extra touch of holiday spirit. I personally love these large Rae Dunn-inspired mugs from Home Goods. Hobby Lobby has the BEST Gingerbread Houses! I love this spoon rest I picked up at Amazon:) With the delightful combination of a whimsical gingerbread houses and a hot cocoa haven, your Christmas coffee bar is sure to become the heart of holiday gatherings. May your holidays be filled with warmth, sweetness, and the magic of Christmas! https://klassydesignventures.com/wp-content/uploads/2023/11/7446733c3d35487fa9ebff855b2a2019-1.mov This notice is visible to admins only. Visual Header disabled due to GDPR setting. Click here for more info. This message is only visible to admins. Problem displaying Facebook posts. Click to show error Error: Error validating access token: The session has been invalidated because the user changed their password or Facebook has changed the session for security reasons. Type: OAuthException Subcode: 460 Solution: See here for how to solve this error This notice is visible to admins only. Like Box disabled due to GDPR setting. Click here for more info. More from my siteLooking for a Classic Look? -Black and White Christmas EntrywaySimple Patio DIY Privacy SolutionBeginners Getting It Done!5 Simple Ways to Upgrade Your Builder Grade KitchenClean Up Your Bathroom Cool Toothpaste Hack!Our Journey to 20 Acres: Building Our Forever Home

Our Journey to 20 Acres: Building Our Forever Home
Our Journey to 20 Acres: Building Our Forever Home
6 Amazing Porch Decorations to Inspire You This Season
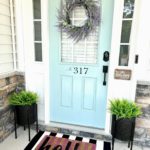
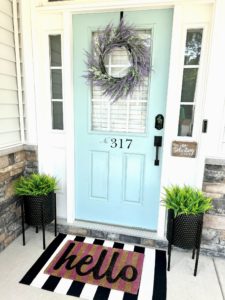
Easy Porch Decorations Spruce up your front porch this season with these easy porch decorations. Modern House Numbers- add a touch of class with these modern house numbers. These can be purchased at your local hardware store or on Amazon. 2. Adorn your door with a beautiful wreath or door hanger that suits your personality. Throughout the year, I tend to change it up a little. Sometimes I want to see a clean and crisp look, while others, the more frou-frou, the better! Check out this tutorial I made for this DIY Spring wreath below This post may contain affiliate links. I may receive commissions for purchases made through links in this post. As an Amazon Associate, I earn from qualifying purchases. Christmas Wreath-you could use this for winter as well. DIY Paintend Chevron Easter Door Hanger DIY Spring Floral Wreath Simple Summer Look DIY Wreath Tutorial HERE 3. Offer ambiance for your guest by adding lanterns, or patio lights. I have added few of my favorites below. Check out my post for this backyard privacy screen here. This beauty is offered through QVC- high-quality lantern &waterproof candles Shatterproof/ Waterproof Patio String Lights 4. Accent rugs add a touch of comfort to any space. Layering rugs is all the rage right now. Here are a few of my favorites. Hello Rug- Michaels Black and Whited Striped Rug -Amazon 5. Planters with faux flowers and greenery if you don’t have quite the green thumb. these may be the perfect option for you. It gets SUPER hot here in NC. By mid-July, my flowers always look a little droopy. Here is a UV-resistant/waterproof option for those like me. Dollar General Finds- I painted them black! 8 Pack – 1 per planter- Amazon 6. Add seating and pillows for comfort. More from my site5 Simple Ways to Upgrade Your Builder Grade KitchenModern Bathroom Makeover-“I Painted My Bathroom Countertops with Spray Paint!”How to Design Your Halloween Coffee Bar!Welcome Friends!The BEST Way to Paint Your Kitchen Cabinets- (FOR LESS)Clean Up Your Bathroom Cool Toothpaste Hack!
The BEST Way to Paint Your Kitchen Cabinets- (FOR LESS)
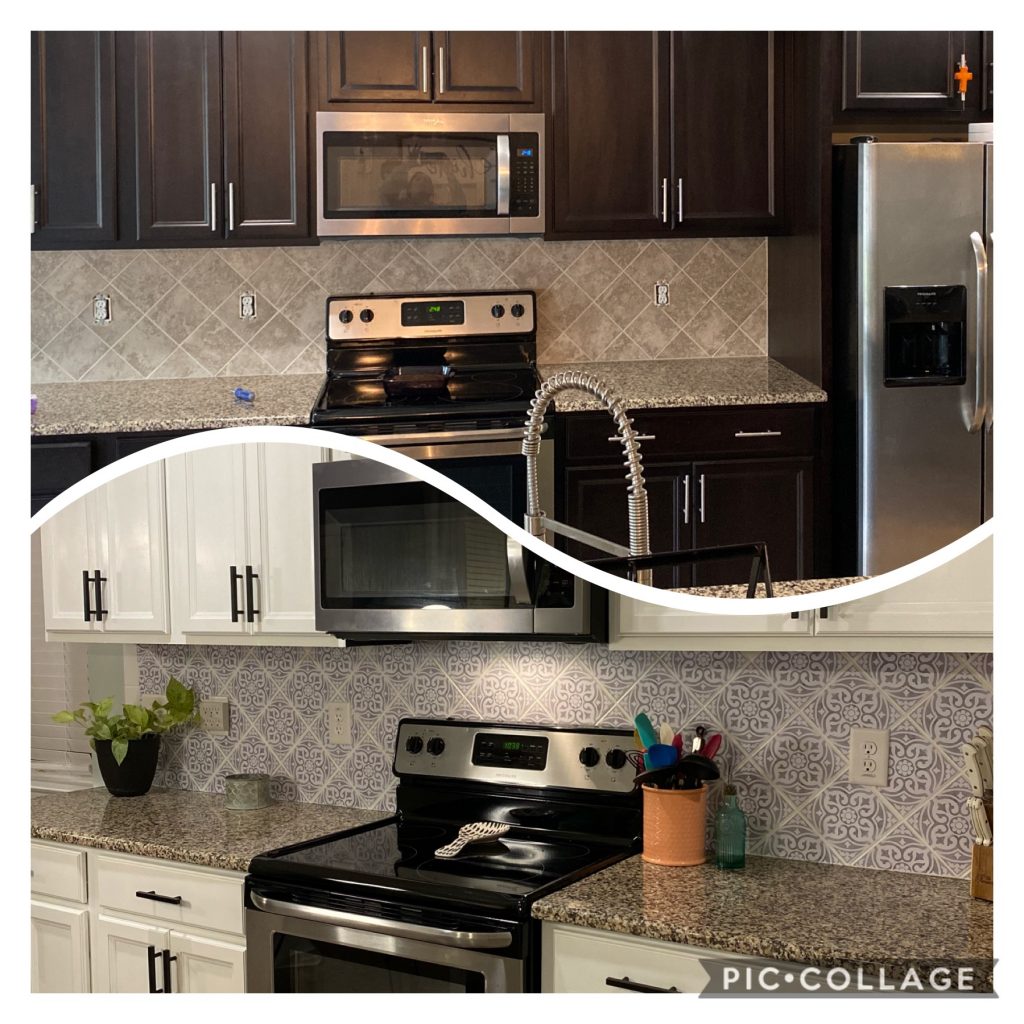
How to Paint Your Kitchen Cabinets White Painting your kitchen cabinets is one of the most cost-effective ways to upgrade your builder-grade cabinets. Painting your cabinets can be a scary process, but trust me, your cabinets will look brand new with a few tips! How should I prep my cabinets to paint? Cleaning your cabinets is the first step to having a beautiful finish. TSP is a great way to degrease your cabinets. According to the instructions, this is a crucial step to follow, scrub the cabinets thoroughly, rinse them, and wipe everything dry with a clean cloth. Now it is time to sand the cabinets slightly and apply a fast-drying primer. Next, apply two coats of enamel paint. Enamel paint is essential as it dries and cures to a tough finish. Enamel paint is the perfect choice for your kitchen cabinets. How much paint should you use to paint your cabinets? This depends on the number of cabinets you will be painting. I used 1 gallon of the Valspar Enamel Paint paired with one gallon of Zinsser Primer. I used two coats of the primer paired with 2- coats of the enamel paint. See the photo of my cabinets before. How should I prep my cabinets to paint? Cleaning your cabinets is the first step to having a beautiful finish. TSP is a great way to decrease your cabinets. According to the instructions, this is a crucial step to follow, scrub the cabinets thoroughly, rinse them, and wipe everything dry with a clean cloth. Now it is time to sand the cabinets slightly and apply a fast-drying primer. Next, apply two coats of enamel paint. Enamel paint is essential as it dries and cures to a tough finish. Enamel paint is the perfect choice for your kitchen cabinets. Here are the products I used below. I can’t say enough good things about them. Check out this article from Spruce.com that gives you a little more info about what TSP is and why it’s a crucial step not to skip when prepping your cabinets. What is the cost of painting kitchen cabinets? 1 Gallon –Primer: $27 1 Gallon-Paint: $59 ( You may need two depending on the size of your kitchen) Pack of Foam Rollers and Tray- $14 Updated Hardware– Not necessary-$45 Angled Paintbrushes–$18 Much better than the thousands of dollars quotes I received! Steps to follow when painting your cabinets … Remove all hardware and cabinet doors- be mindful of either labeling them or completing a few sections at a time. Clean the cabinets thoroughly. See above for more details. Lightly sand cabinets to give your paint something to adhere to. You could also use a liquid deglosser. Prime cabinets 1-2 coats- allow drying time in between. Find a spot in your home where your cabinets can be painted and allowed to dry between coats—paint one side at a time, flip and repeat. Paint cabinets using the Valspar Cabinet Enamel Paint 2-3 coats here, depending on how dark your cabinets are. My cabinets were a dark expresso and required three coats. Once cabinets are dry, you may begin to carefully add hardware and hang them back in their original space. Cabinet paint takes about 30 days to cure, so allow this time – avoid cleaning them with anything other than a damp cloth. Kitchen Cabinets Before and After The cabinets have held up so well; I have had a few knicks that needed touchup s but other than that -they turned out AMAZING! The cabinets pictured below were painted over a year ago, and they still look great today! It’s definitely worth the work!! https://klassydesignventures.com/wp-content/uploads/2022/05/video-output-1771000A-C502-4D77-A1A7-19DEAE42C0B2.mov Click the video above for the ISLAND SHIPLAP TUTORIAL! Click here This notice is visible to admins only. Visual Header disabled due to GDPR setting. Click here for more info. 383 Klassy Design Ventures Hi everyone, I’m Meredith! I am a lover of home decor and ALL things DIY- Please join me!! Klassy Design Ventures 3 days ago Do you want to update your front porch? Look no further. I’ve got some simple and INEXPENSIVE updates to refresh your summer front porch. klassydesignventures.com/6-porch-decorations-to-inspire-you-this-season/ … See MoreSee Less Photo View on Facebook · Share Share on Facebook Share on Twitter Share on Linked In Share by Email Klassy Design Ventures 1 week ago DIY Board and Batten Wall, board, and batten entryway ideas.https://pin.it/5YsDeBT … See MoreSee Less Photo View on Facebook · Share Share on Facebook Share on Twitter Share on Linked In Share by Email Klassy Design Ventures 1 week ago Klassy Design Ventures updated their phone number. www.facebook.com View on Facebook · Share Share on Facebook Share on Twitter Share on Linked In Share by Email Klassy Design Ventures 1 week ago pin.it/2ApCMvVSave this one ☝️ 📌 … See MoreSee Less Video View on Facebook · Share Share on Facebook Share on Twitter Share on Linked In Share by Email Klassy Design Ventures 1 week ago Are you looking for how-to paint builder-grade cabinets? Such an easy way to update your kitchen. Please don’t pay the professionals. Any beginning DIY er can handle this one!klassydesignventures.com/the-best-way-to-paint-your-kitchen-cabinets/ … See MoreSee Less Photo View on Facebook · Share Share on Facebook Share on Twitter Share on Linked In Share by Email This notice is visible to admins only. Like Box disabled due to GDPR setting. Click here for more info. More from my site5 Simple Ways to Upgrade Your Builder Grade KitchenModern Bathroom Makeover-“I Painted My Bathroom Countertops with Spray Paint!”13 Tools that will Make Your DIY Projects Come to LifeBeginners Getting It Done!Welcome Friends!6 Amazing Porch Decorations to Inspire You This Season

5 Simple Ways to Upgrade Your Builder Grade Kitchen
Are you looking to upgrade your kitchen? There are so many options. I have narrowed it down to the TOP 5!